Entry
How to Set up Google Search Console on Vercel Websites
Practical guide on how to track traffic to your Next.js site
Step 1: Add Website onto Google Search Console
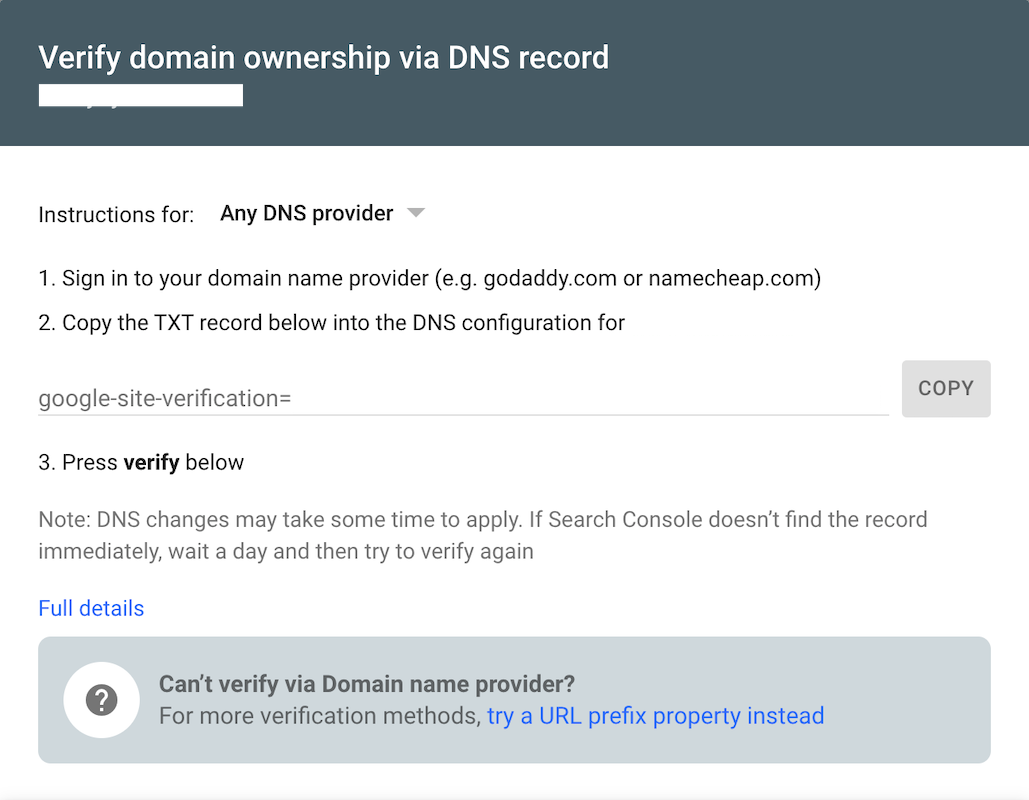
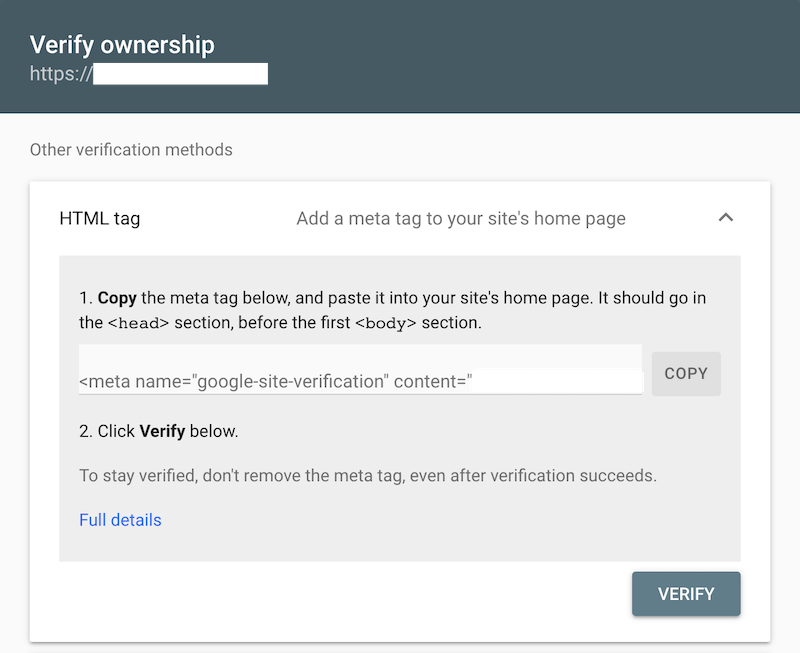
Follow the instruction on Google Search Console to add a property. Then depending on whether you use custom domain or Vercel's domain, proceed to choose one of the following methods for verification:
If you use custom domain -> verify domain ownership via DNS record
If you use Vercel’s domain -> verify via HTML tag by adding meta tag
Step 2: Add sitemap to your Next.js/Vercel website
To add a static sitemap:
- Generate a sitemap using a sitemap generator such as https://www.xml-sitemaps.com/.
- Add
sitemap.xmlfile into the public folder of your Next.js project. Doing this will let Next.js know to putsitemap.xmlat the root directory. You can check, locally first, if thesitemap.xmlfile has been added successfully, by runningnpm run dev, and going tolocalhost:3000/sitemap.xml. Once you have verified that the sitemap can be accessed locally, save and push your change to production. You should be able to access the sitemap atwww.yourwebsite.com/sitemap.xml.
To programmatically generate a sitemap:
- Install the sitemap generating library:
npm install --save sitemap
- Create
sitemap.jsatpages/api/directory. Create anapidirectory in yourpagesdirectory if there is not one. - Copy the following code and modify accordingly to suit your needs. Remember to change the
hostnameto your domain andpost_slugsto the URLs of your website that you wish to be discovered. The following code creates an entry in the sitemap for each URL by looping through possible slugs. This code will dynamically generate a.xmlfile.
import { SitemapStream, streamToPromise } from "sitemap";

export default async (req, res) => {
  try {
    const smStream = new SitemapStream({
      hostname: `https://YOURDOMAINNAME.COM`,
      cacheTime: 600000,
    });

    // List of posts
    const post_slugs = [
      "news-1",
      "news-2",
      "news-3"
    ];

    // Create each URL row
    post_slugs.forEach((post) => {
      smStream.write({
        url: `${post}`,
        changefreq: "daily",
        priority: 0.9,
      });
    });


    // End sitemap stream
    smStream.end();

    // XML sitemap string
    const sitemapOutput = (await streamToPromise(smStream)).toString();

    // Change headers
    res.writeHead(200, {
      "Content-Type": "application/xml",
    });

    // Display output to user
    res.end(sitemapOutput);
  } catch (e) {
    console.log(e);
    res.send(JSON.stringify(e));
  }
};
- Save the file. Verify if you can access sitemap locally first by checking
localhost:3000/api/sitemap. Once you have verified that the sitemap can be accessed locally, save and push your change to production. You should be able to access the sitemap atwww.yourwebsite.com/sitemap.
Step 3: Point Google Search Console to your sitemap
 Upload your new sitemap URL on Google Search Console. Google will let you know if they have successfully added the sitemap! Congrats, you just improved your SEO!